Laminate flooring is a popular choice for homeowners due to its affordability, durability, and easy installation. However, for the best results, it's crucial to ensure that your existing wood floor is properly leveled before installing laminate planks. An uneven subfloor can lead to a host of problems down the line, including squeaky floors and premature wear and tear on your laminate. In this guide, we'll walk you through the steps to level your wood floor effectively.
Table of Contents

Prepare the Surface Before you begin, clear the room of any furniture, carpet, or debris. Inspect the wood floor for any protruding nails or staples. Use a floor scraper or pliers to remove any obstructions and ensure the surface is clean and smooth.
Measure and Mark High and Low Spots With a measuring tape and a chalk line, identify the high and low spots on your wood floor. Mark these areas so that you can concentrate your leveling efforts accordingly. Keep in mind that you want to create a gradual slope towards the lower areas for proper drainage.
Mix and Apply Leveling Compound Follow the manufacturer's instructions to mix the leveling compound or self-leveling underlayment in a bucket. Typically, you'll need to add water and stir until you achieve a smooth, lump-free consistency. Start by pouring the compound onto the lowest areas of the floor, and use a trowel to spread it evenly. Work your way towards the high spots, feathering the edges to create a gradual slope. Make sure to fill any cracks or gaps as you go.
Smooth and Level After applying the leveling compound, use a sander or a long, straight board to smooth and level the surface further. This step is crucial to achieving a seamless transition when you install your laminate flooring. Allow the compound to dry completely as per the manufacturer's recommendations.
Sand and Clean Once the leveling compound is dry, sand any rough spots or ridges for a perfectly smooth surface. Vacuum and clean the floor to remove any dust or debris.
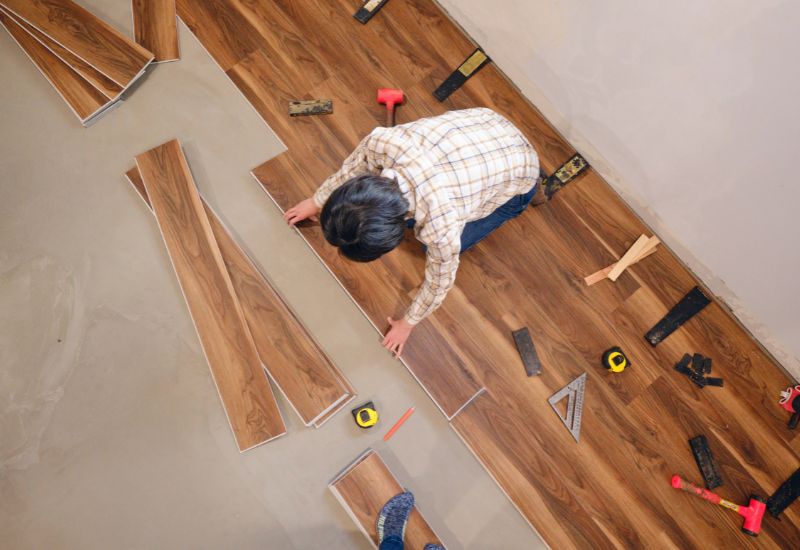
Install Laminate Flooring With your wood floor now properly leveled and prepared, you can begin installing your laminate flooring according to the manufacturer's instructions. Ensure you leave the recommended expansion gap around the perimeter of the room, and don't forget to acclimate the laminate planks to the room's temperature and humidity before installation.
Properly leveling your wood floor is a crucial step in ensuring the success and longevity of your new laminate flooring. By following these steps and taking your time to achieve a flat and smooth surface, you'll be on your way to enjoying a beautiful and durable floor that enhances the overall aesthetics of your home. Happy flooring!